Making a Hello (payment) World request
Did you know?The Recipes section of this Developer Portal provides tutorials on how to set up your backend and frontend servers to make your first payment request, all while limiting your PCI scope.
Use the tutorial on this page to get an idea of the overall payment flow, without worrying about PCI scope.
| Key concepts covered |
|---|
|
| Difficulty | Estimated time | Platforms | Technologies used |
|---|---|---|---|
 |  | cUrl |
| Prerequisites |
|---|
In order to complete this tutorial, you must meet the following requirements:
|
| APIs |
|---|
|
After making your first request and verifying that everything is ready to go from an authentication and environment standpoint, you are ready for your first card processing request in the sandbox.
This tutorial presents the main steps and code snippets that will submit a card payment request and receive a response through Node.
Payment flow
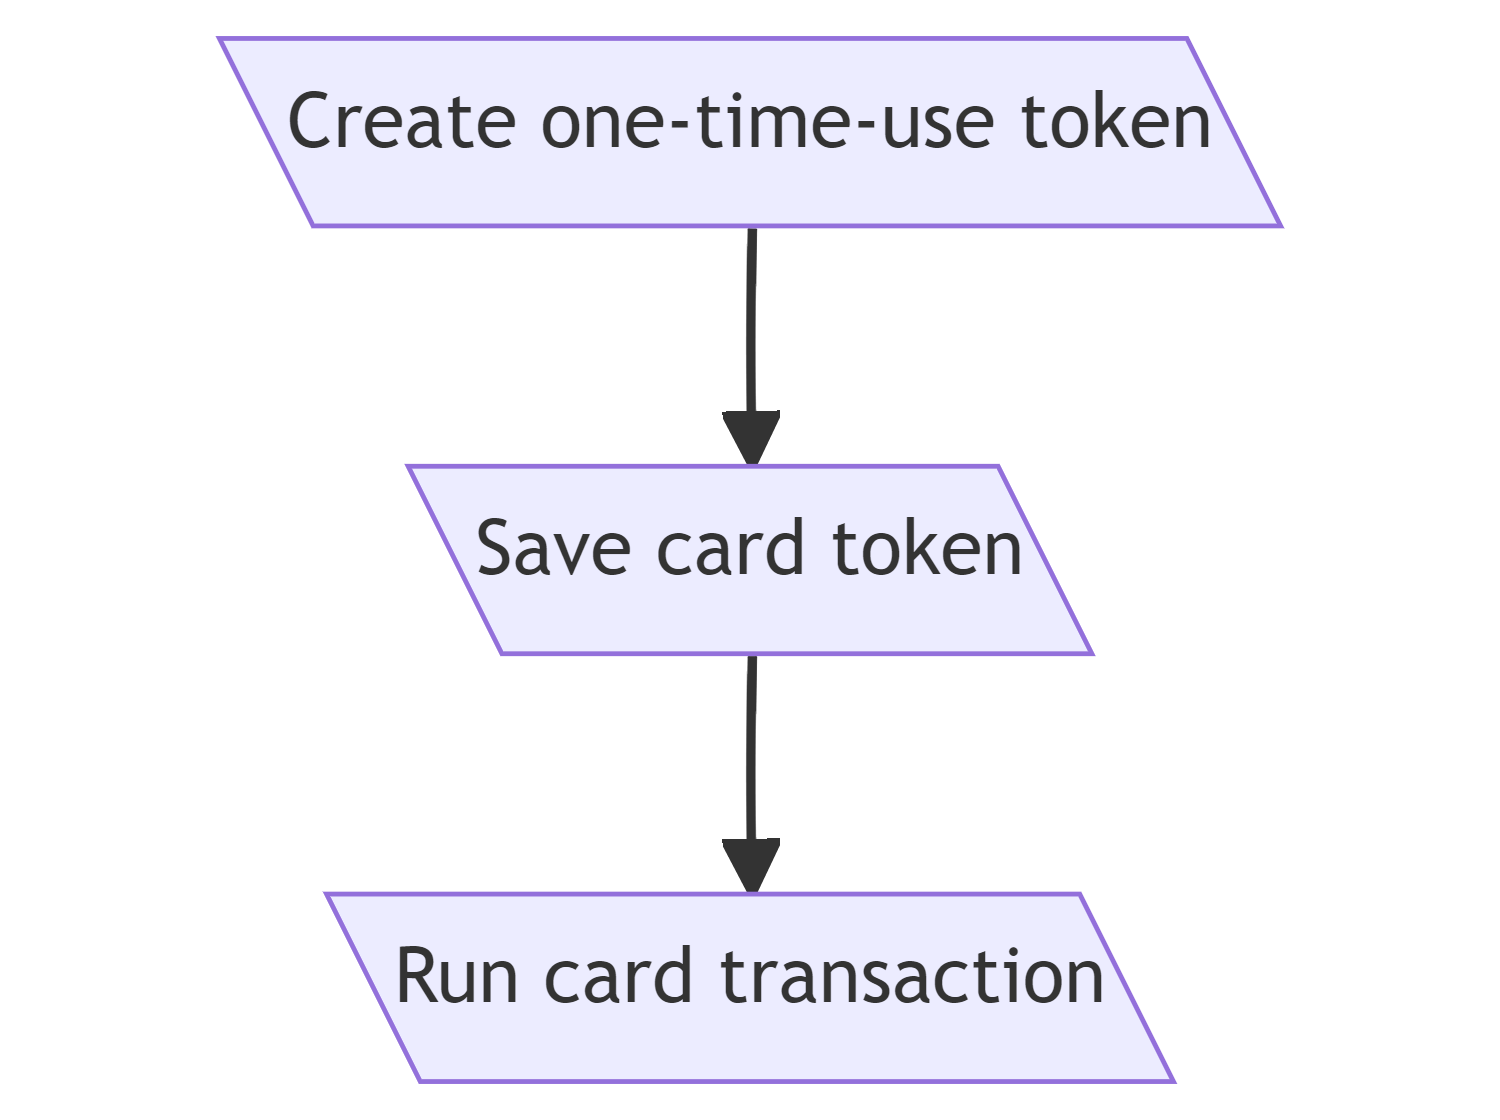
The general flow of making a card payment includes the following steps:
- Get a one-time-use token by including any necessary processing options.
- Save a card token. This includes using the one-time-use token, getting a card number and encrypting it, and getting the required values, such as the expiration date.
- Run the card transaction. This includes using the saved card token and the amount of the transaction.
The flow looks like the following diagram:
Steps
Complete the following steps to make your first payment request:
-
Open a Unix prompt, such as Cygwin (on Windows) or Terminal (on Mac OS X).
-
At the command prompt, send a POST request to the Create one-time-use token endpoint for the "Save card token API request" option.
Include your encoded login in the
authorizationheader. You don't need to include any specific body parameters. However, in our example, we are going to send thedata.customer.customerRefparameter. For example,RP006.curl --request POST \ --url https://api.nexiopaysandbox.com/pay/v3/token \ --header 'accept: application/json' \ --header 'authorization: Basic [Base64_encoded_login]' \ --header 'content-type: application/json' \ --data ' { "data": { "customer": { "customerRef": "RP006" } } }'Note the value for the
tokenparameter that gets returned. This is the one-time-use token that you'll use in step 3. -
Send a POST request to the Save card token endpoint.
Include your encoded login in theauthorizationheader. Include the one-time-use token you got from step 2 as thetoken. Provide any value for thecard.cardHolderNameand any future date for thecard.expirationMonthandcard.expirationYearparameters (for example,12and28). Include the encrypted card value as thecard.encryptedNumber(the value included in this example is the encrypted value for the test card of4111111111111111). Learn more about encrypting card values in Creating a save card page with your own form, step 6.curl --request POST \ --url https://api.nexiopaysandbox.com/pay/v3/saveCard \ --header 'accept: application/json' \ --header 'authorization: Basic [Base64_encoded_login]' \ --header 'content-type: application/json' \ --data ' { "card": { "cardHolderName": "John Doe", "expirationMonth": "12", "expirationYear": "28", "encryptedNumber": "so/dwpbVG7E2NpX2XS72urbJXCbUKuIiZoiwNpCe8LqWthzVGDDUINwuT5cTellulgRmKoDcGvoyY+vXp+cPW8qkf2wXn4LnGTaNQvlu6wr25O8YgzAqbi2qDokAknO3MnTyK+d4szkuRDozH3fGmdit25ZNaFpy+vzRVRTDAeW2ZUzlye7/WQRJBMZu8pgGD3FsnPVqnC4qwpukO/DKvNbSgqpFRGGPS63yZnO+vcK13BoZdta39D/UCd4VgoAQKTokvCZluYwiRxosZDj8sa0TavVa03jHgHt4fy1eamqHi6mVkd+MOADV3KoGKUJGuc8xW0YCB5PPeryMt14XDA==" }, "token": "[one-time-use-token]" }'Note the value returned in the
token.tokenparameter. This is the card token. You will use this in the next step. Card tokens can be used to process through any MID on your account. They are not restricted to a specific merchant account or currency. -
Send a POST request to the Run card transaction endpoint.
Include your encoded login in theauthorizationheader, a value fordata.amount(such as29.99), and the card token you got in the response for step 3 in thetokenex.tokenparameter. We will also include the order number for this transaction.curl --request POST \ --url https://api.nexiopaysandbox.com/pay/v3/process \ --header 'accept: application/json' \ --header 'authorization: Basic [Base64_encoded_login]' \ --header 'content-type: application/json' \ --data ' { "data": { "amount": 29.99, "customer": { "orderNumber": "210058A-1" } }, "tokenex": { "token": "[saved_card_token]" } }'Look for the
transactionStatusto show eitherpendingorsettledto indicate that the request was successful. The status of pending means the transaction is approved but the batch has not yet settled. Pending transactions will settle without any issue. A successful request returns a response similar to the following:{ "id": "eyJuYW1lIjoWJlciI6IjMxCJtZXJjaGFudElkIjoiMoiVVNEIn0=eyJuYW1lIjoib3BlbnBheSIsIm1lcmN", "merchantId": "100039", "transactionDate": "2023-01-20T22:54:18.214Z", "authCode": "035410", "transactionStatus": "pending", "amount": 29.99, "transactionType": "sale", "currency": "USD", "gatewayResponse": { "refNumber": "8E56222GD0701110", "gatewayName": "nexio_async" }, "data": { "amount": 29.99, "currency": "USD", "settlementCurrency": "USD", "customer": { "customerRef": "RP006", "orderNumber": "210058A-1" } }, "card": { "cardNumber": "411111******1111", "firstSix": "4111111", "lastFour": "1111", "expirationYear": "28", "expirationMonth": "12", "cardHolder": "John Doe" }, "kountResponse": { "status": "success", "rules": "[kount_rules_response]" }, "token": { "firstSix": "411111", "lastFour": "1111", "token": "[saved_card_token]" } } -
With a successful response, you have now sent a card transaction request and have said hello to the world of payments with Nexio.
See Also
- Recipes - For a step-by-step tutorial on how to do this process through your own website.
- Getting started with ecommerce - For lots of different tutorials for doing more with payments.
Updated 11 months ago